EarMaster Cloud Account Setup (for the administrator)
EarMaster Cloud consists in 2 distinct areas:
-
The administrative website at https://cloud.earmaster.com: this is where the administrator of the account of a school manages users, credits and classes.
-
The EarMaster application for Windows, Mac, iOS, Android and Chromebook, which is where the exercises are made and assigned (Teachers on PC/Mac) and completed (Students on all platforms). Students and teachers connect the app to the EarMaster Cloud account of their school using their personal EarMaster Cloud user credentials, which they have received by email when their account was created by the Admin of the school account. As soon as the app is connected, it will fetch class and course data from the cloud, and upload all results automatically as the students complete their assignments.
If your school is paying for student access with EarMaster Cloud credits, then you can watch this video tutorial or read the step-by-step instructions below to learn how to set up your school account:
How to proceed - school-paid user access
If your school has bought credits to give students access to EarMaster, then please follow the instructions below. If students are expected to pay for their own access to the system, then please refer to the section titled "How to proceed - student-paid subscriptions" further down.
1. Log into your Admin dashboard
Go to https://cloud.earmaster.com and log in with your administrator login, which was sent to you by e-mail and consists of:
- School account ID
- Password
The first thing you see when you have logged in is the Dashboard. It will display information on how many credits are available for your account, how many users and classes are active, etc.
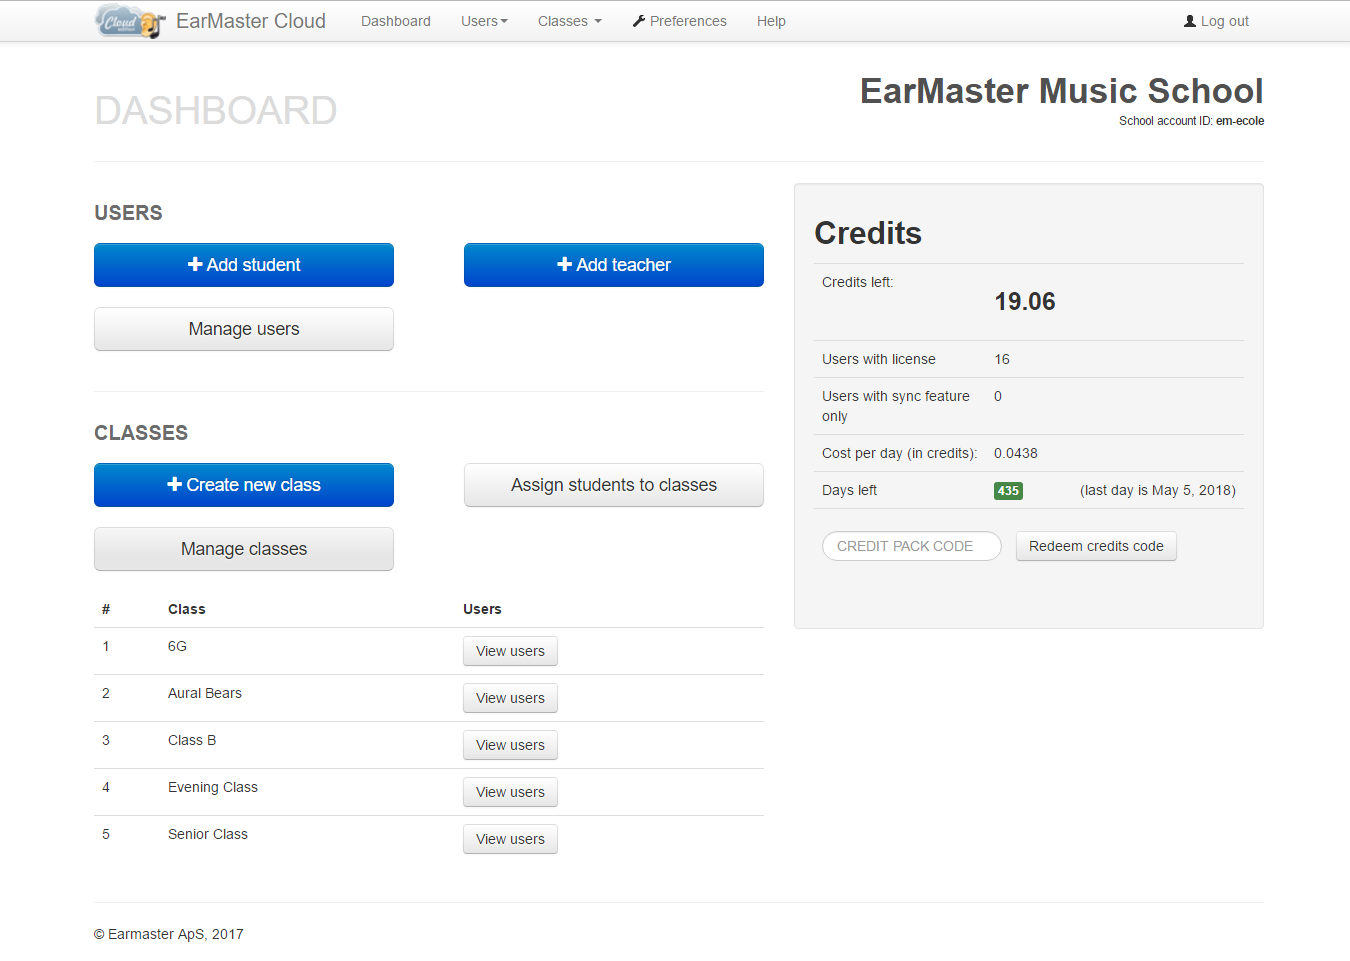
2. [Optional] Create classes
In EarMaster, a class is a group of students that will work on the same assignments. If you use classes, make sure to add at least one teacher to each class. The teachers of a class are the only ones who can give assignments and see the results for that class.
To add a class, click on Create new class in your dashboard. This step is optional, but even with only a few students, it will make it much easier to assign workbooks later on.
3. Add users
You can add users in two ways:
a. In bulk by uploading a user list (see "Upload user lists" tab above)
b. Manually one by one (read below)
To add users manually, click on Add Student or Add Teacher from the Dashboard or in the Manage Users page.
Please notice:
- You have an Admin login to manage the account of your school now, but If you also want to use the software as a Teacher to make assignments and monitor student results, then you need to create a user with Teacher access level for yourself.
- All the users you add receive an email with a download link and their user credentials. So make sure that your students are aware that an email from EarMaster Cloud is incoming before you add them to your account. Otherwise they might delete the email by mistake or oversee it.
- If users have forgotten or lost their user credentials, you can resend them by using the Resend email function in Manage Users, or they can request a new one here: https://www.earmaster.com/support/earmaster-cloud-login-recovery.html
- You can also delete the users that shouldn't be active any longer by checking boxes in the left column, and then by clicking on the Delete button.
Note: if your students don't have email addresses or if you would like to manage their account for them, you can add ?[user name] at the end of your email alias for each user you add. Then you will receive all the system emails sent to these users in your own inbox.
For example: This email address is being protected from spambots. You need JavaScript enabled to view it.→admin?This email address is being protected from spambots. You need JavaScript enabled to view it.. For more info, please check the FAQ.
4. [Optional] Enroll students and teachers into classes
If you have created classes, you can now dispatch your students and teachers into them using the Enroll users into classes button from the Dashboard, or via the Manage Users page by selecting users and clicking on the Classes button.
5. Users connect EarMaster to the Cloud
Users should now have received their user credentials, so they can connect the EarMaster app on all platforms to the Cloud. You can follow the status of the email sending and last login time of each user in the "Manage Users" section of your Admin dashboard. For more info about this step, please refer to the Connect EarMaster to the Cloud tab in the Teacher and Student sections of these Cloud support pages.
If you have a Teacher account, you will have access to a special section in the PC/Mac version of EarMaster 7 (not available on iOS, Android and Chromebook). Read tutorials here
How to proceed - student-paid subscriptions
If your students are going to pay for their own access by subscribing to EarMaster Cloud on a private basis, then here is how to proceed:
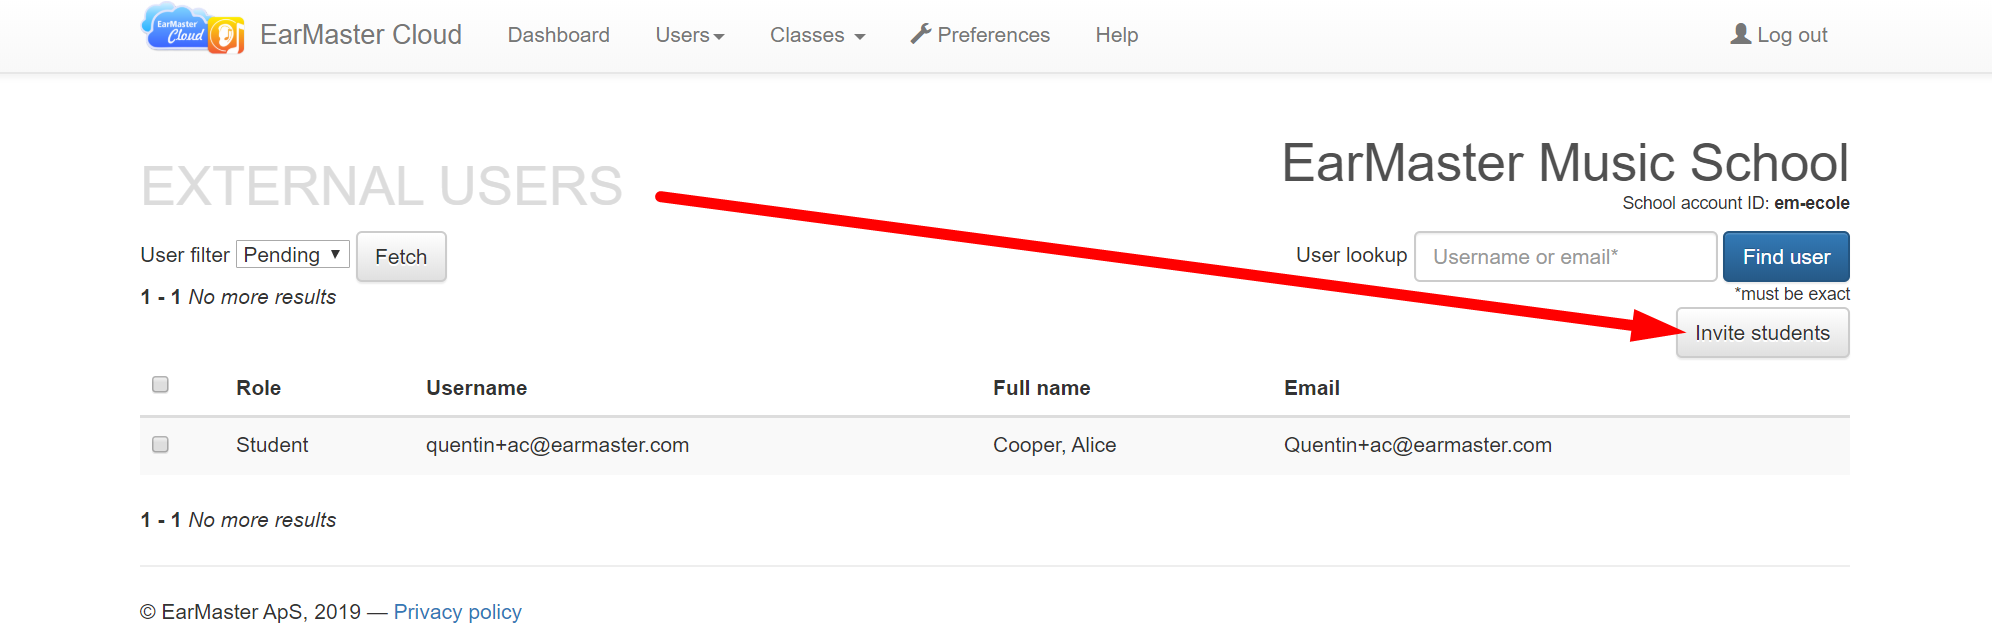
1. Go to your Admin dashboard at https://cloud.earmaster.com, find the USERS menu and click on EXTERNAL USERS.
2. Click on the button labelled INVITE STUDENTS and type the email addresses of the students you want to invite to subscribe. Type one email address per line, and then click SAVE to send out all invites. You should see a list of the invited students by setting the USER FILTER to INVITED and clicking on FETCH.
3. Your students will now receive an email with a link which will enable them to subscribe to EarMaster Cloud on a private basis while linking their account to your school account. As soon as a student has subscribed, you will see his/her name appear in the MANAGER USERS section of your Admin dashboard.
Notice: If your school is not paying for student licenses, you should not use the "ADD STUDENT" feature visible in the main screen of the dashboard and in MANAGE USERS. The only thing you need to do is invite students as describe above. The rest is handled automatically.